If you want the ability to use roll-up summary fields, remember that they only work in a master-detail relationship. These fields are not available if you want to use them in a lookup relationship. Why is this the case? Because they can aggregate data from the child detail records and present summarized values on the master record. For instance, this could be the total of orders (detail) for a customer (master).
And now, I’ll show you how to create such a relationship.
Before proceeding with any configuration, you need to design your structure. Determine which of the objects is master and which is detail. If the objects do not exist, you must first create them:
- We go to Setup | Object Manager, then select the object on which we want to introduce such a configuration. And let’s pause here for a moment. Remember to create the master-detail field on the detail object. It is from it that we will create the relationship to the master.
- We enter the Fields & Relationships section, then click on the New button and select Master-Detail Relationship.
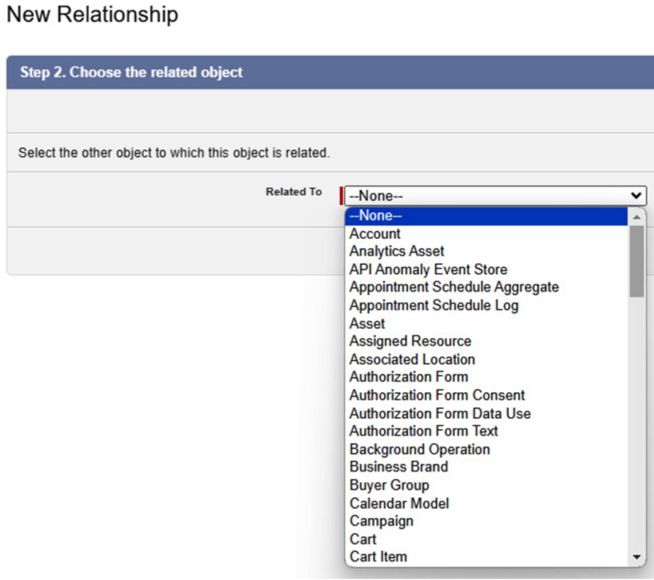
- Now, we have to select the master object. We choose it from the available Related To list. After choosing, we click on it and confirm with the Next button:

Figure 5.2 – “Related To” dropdown
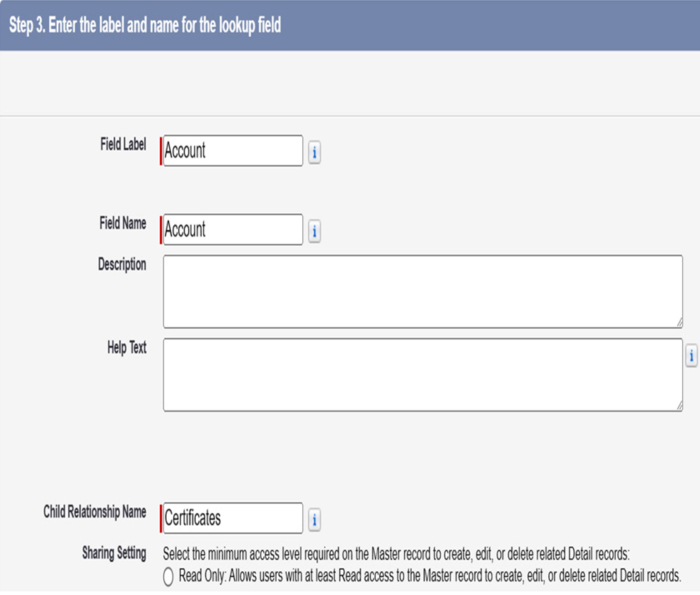
I. We enter details such as Field Label and Field Name for the new master-detail relationship. As with any new field, we can add help text and also provide a description. Here, we can also assign a new name for the Child Relationship field – an internal name, which if changed can generate errors if, for example, the field is used in integration.
II. The next item in the same step is setting Sharing Settings, which allows granting access to the master object at the Read or Read/Write level. And we set Allow reparenting, which is nothing but changing the master object for the child.
III. The last setting in this step is the lookup filter, where we can set certain conditions that will apply when selecting a record (for example, if we are looking for an Account, we can set a condition so that records with a billing address in the United Kingdom can be selected). Next, you will see a form for step 3, where you will find all these settings:

Figure 5.3 – Step 3: settings and conditions
- The fourth step is fairly standard when adding fields – setting visibility and profiles.
