But what happens when our company is so unique that it needs something tailor-made? Remember those toys where you had to match the right shape with the right hole? When the shapes matched the holes, you knew everything would go smoothly, but what if someone handed you a block of an undefined shape that couldn’t fit into any hole? Then, new possibilities needed to be created. This is what custom objects are for. Salesforce couldn’t predict every scenario (unless it was like Dr. Strange in Avengers: Infinity War), so it gave administrators the ability to create their own solutions.
Administrators can create any object that will store detailed and unforeseen data by Salesforce. These objects are fully customizable to the needs of the company, allowing them to be freely named, equipped with required fields, and to create relationships with other standard or custom objects. Importantly, these objects are scalable, meaning they can grow with the needs of the company. Often companies start with very simple processes that cover a few steps and a certain amount of data. But as companies grow and their needs change, processes also change. Thanks to custom objects, Salesforce also changes and evolves with the client. Such objects grow both in terms of data storage, meaning a larger number of fields, and the complexity of relationships in the system (more master-detail or lookup relationships).
Now that we know what a custom object is, let’s check how to create one:
- Can you guess the first step? Yes – it’s Setup | Object Manager.
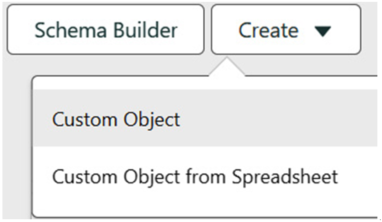
- Then, click the Create button. You will get two options: Custom Object or Custom Object from Spreadsheet. The latter option allows for quicker creation of a new object using a spreadsheet. But we will go through the first option, which is manual creation. It looks exactly like in Figure 5.6:

Figure 5.6 – Creating a custom object
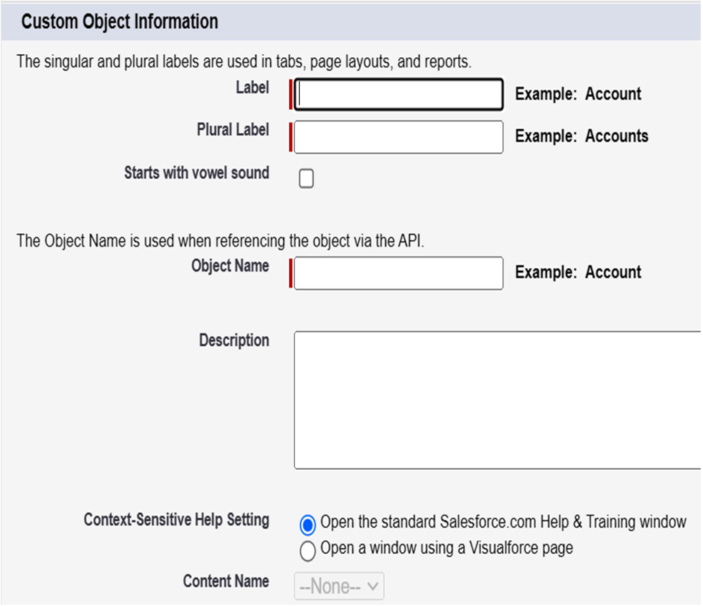
- After selecting Custom Object, you will be taken to a form where you need to fill in details such as label, plural label, object name, and description:

Figure 5.7 – Custom Object Information
- Below the Custom Object Information and Enter Record Name Label and Format sections, you will find additional options. Thanks to checkboxes in the Optional Features section, you can immediately add the object to reports, enable activities related to it, or enable history tracking.
- In Object Classification, you can enable or disable sharing of the object, as well as Bulk/Streaming API options.
- Next, you have the option to set the deployment status. In Development will not share the newly saved object, keeping it on the backend without user access. The Deployed option will provide access to the new object.
- The last two sections are equally important. The first is Search Status. This option allows you to enable internal Salesforce search for the new object. The last option gives you the ability to add notes and attachments to the new object on the page layout. And one of the more important checkboxes is the last one. It activates the New Custom Tab Wizard, which is a form that allows you to create a new tab. Without this, you will have to do it yourself through an option located elsewhere.
- After selecting all the options you want in the new custom object, click the Save button. This will save your new object, in which you can start creating new relationships, fields, page layouts, and much more.
